


To simplify internal processes, archive processing and have clear overview, scheduling reports is helpful not just for the single administrator, but entire teams across the Enterprise.
Some useful reports to set on a recurring schedule are reports such as nested group membership reports, last login times identifying inactive users and computers, recent accounts created or GPO status.
The reports are being run in the task service of the machine the application is installed under.
Scheduling a report with active directory report builder is easy. You can schedule your report to automatically be emailed to a specified email address or schedule the report to a shared folder or automatically upload it to a SharePoint location. It’s also possible to save the report in a location and just email the internal link URL to that location.
Either select the report to run with a specified account or just select the local system account if the machine where the application is installed is joined to a domain.
To schedule a report, UAC will prompt if you are not authenticated with a local administrator account. This is required to register triggers in the task service.
In this example we are tracking a migration process from Windows 7 to windows 10 and want to verify the drop of windows 7 machines as they are upgraded.
We want to view the past weeks progress every Monday.
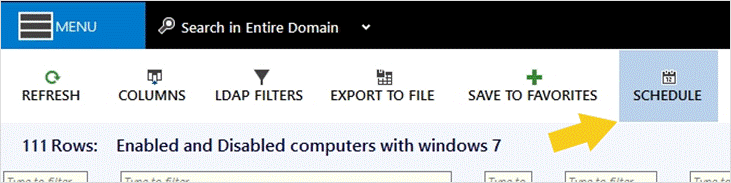
First start by running the report that you want to schedule so you can see the current results and verify it’s the report you need.
Start by selecting your target, in this example Entire domain is select. Run the report and click on schedule.
Here we can set if we want the report to run under a privileged account or authenticate using the machine name (local system)
Run as account can also be changed at any time after the task has been added.
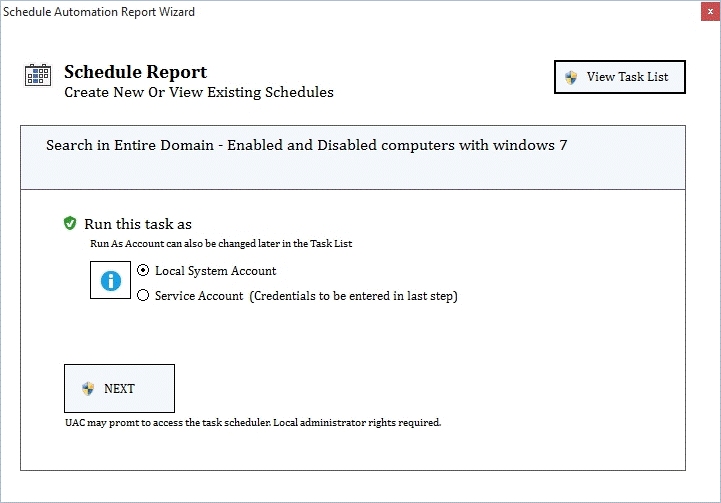
If UAC prompts you will need to enter an account with local administrator privilege in order to start the scheduler.
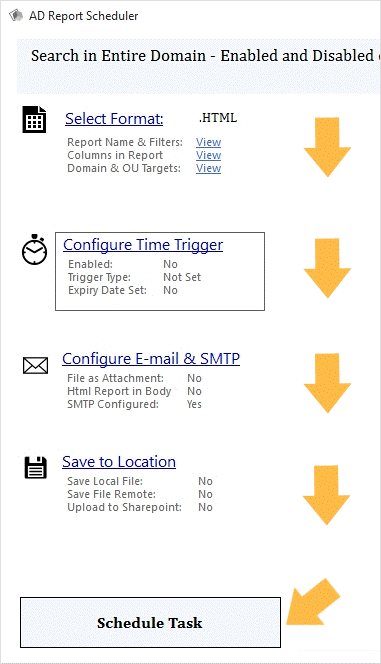
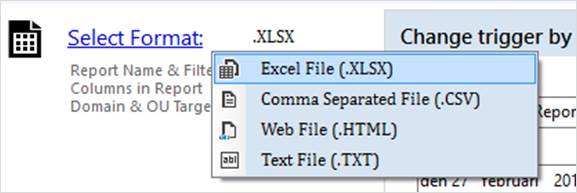
Once the scheduler have started, begin by selecting a file format for your report.
Select the file format of the generated report. Excel does not have to be installed on the machine in order to generate the report to *.xlxs format.
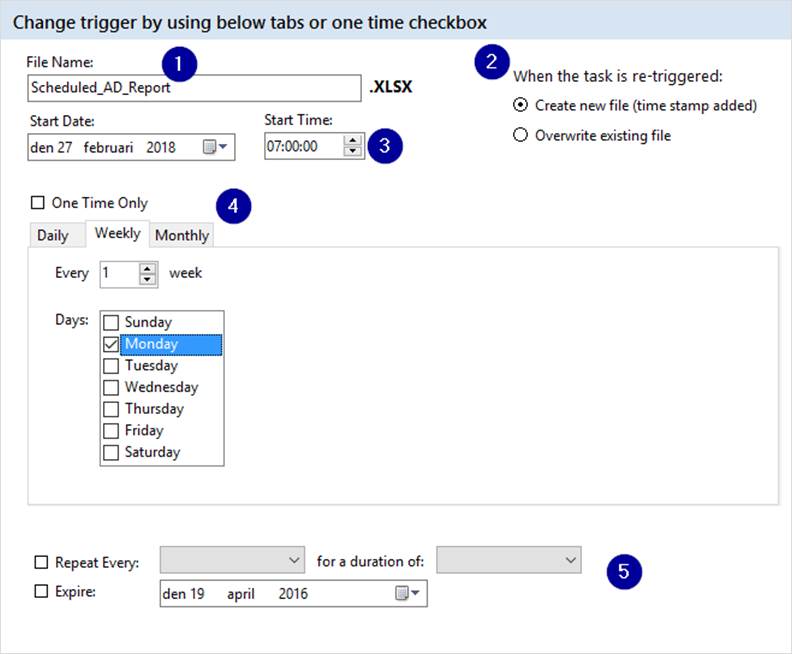
Here you specify when you want the report to be generated and what type of time intervals should be set.
If you intend to schedule the report to a folder you can specify if the file should be overwritten each time, or if a new file should be created ensuring archiving of previous scheduled reports.
There are five main settings that can be configured in the time trigger:
The email configuration is selected by default. There are five main settings to configure here.
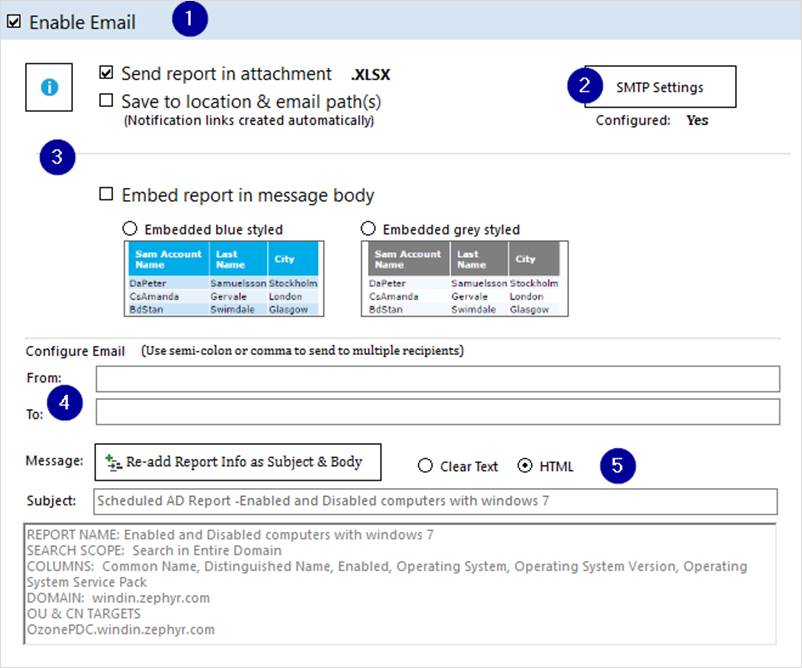
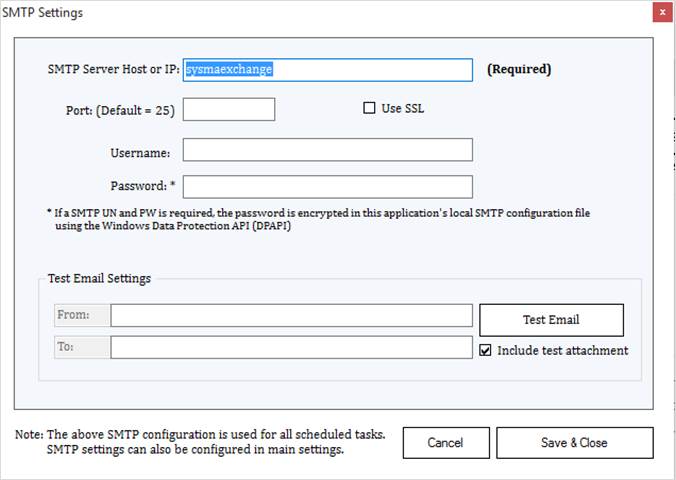
The only required field to configure the SMTP is the host name, although if you need to authenticate to the host this is also possible.
Note that the SMTP setting only needs to be configured one time as the same host is used for all scheduled reports.
Test the email settings by sending a small test attachment and verify the delivery.
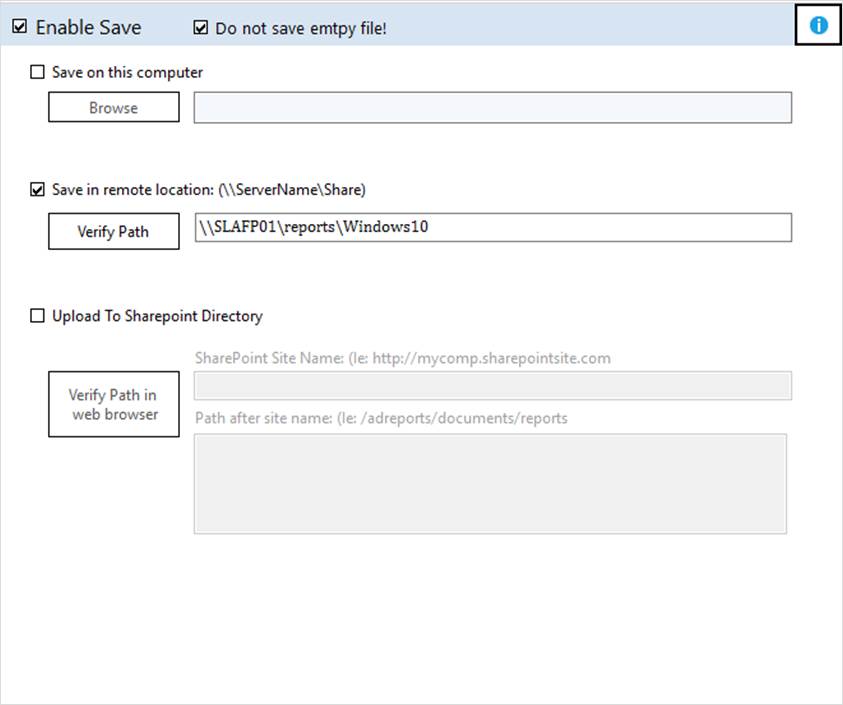
Select where to save the report. Note the tick box: “Do not save empty file”
All three options can be enabled if multiple locations were to be needed.
Click Schedule task to finish the schedule.
If any of the required settings have been missed you will be notified what is needed and can go back and change.
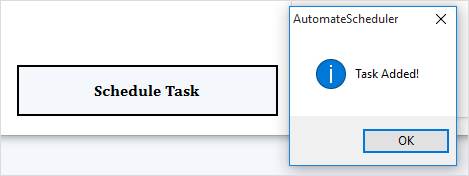
After the task has been added the task scheduler pops up showing the registered task.
Here you can see all scheduled reports and their settings.
The following options are available for scheduled tasks:

Click on “Schedules” to open the task viewer from the application. All the scheduled reports can be edited.
